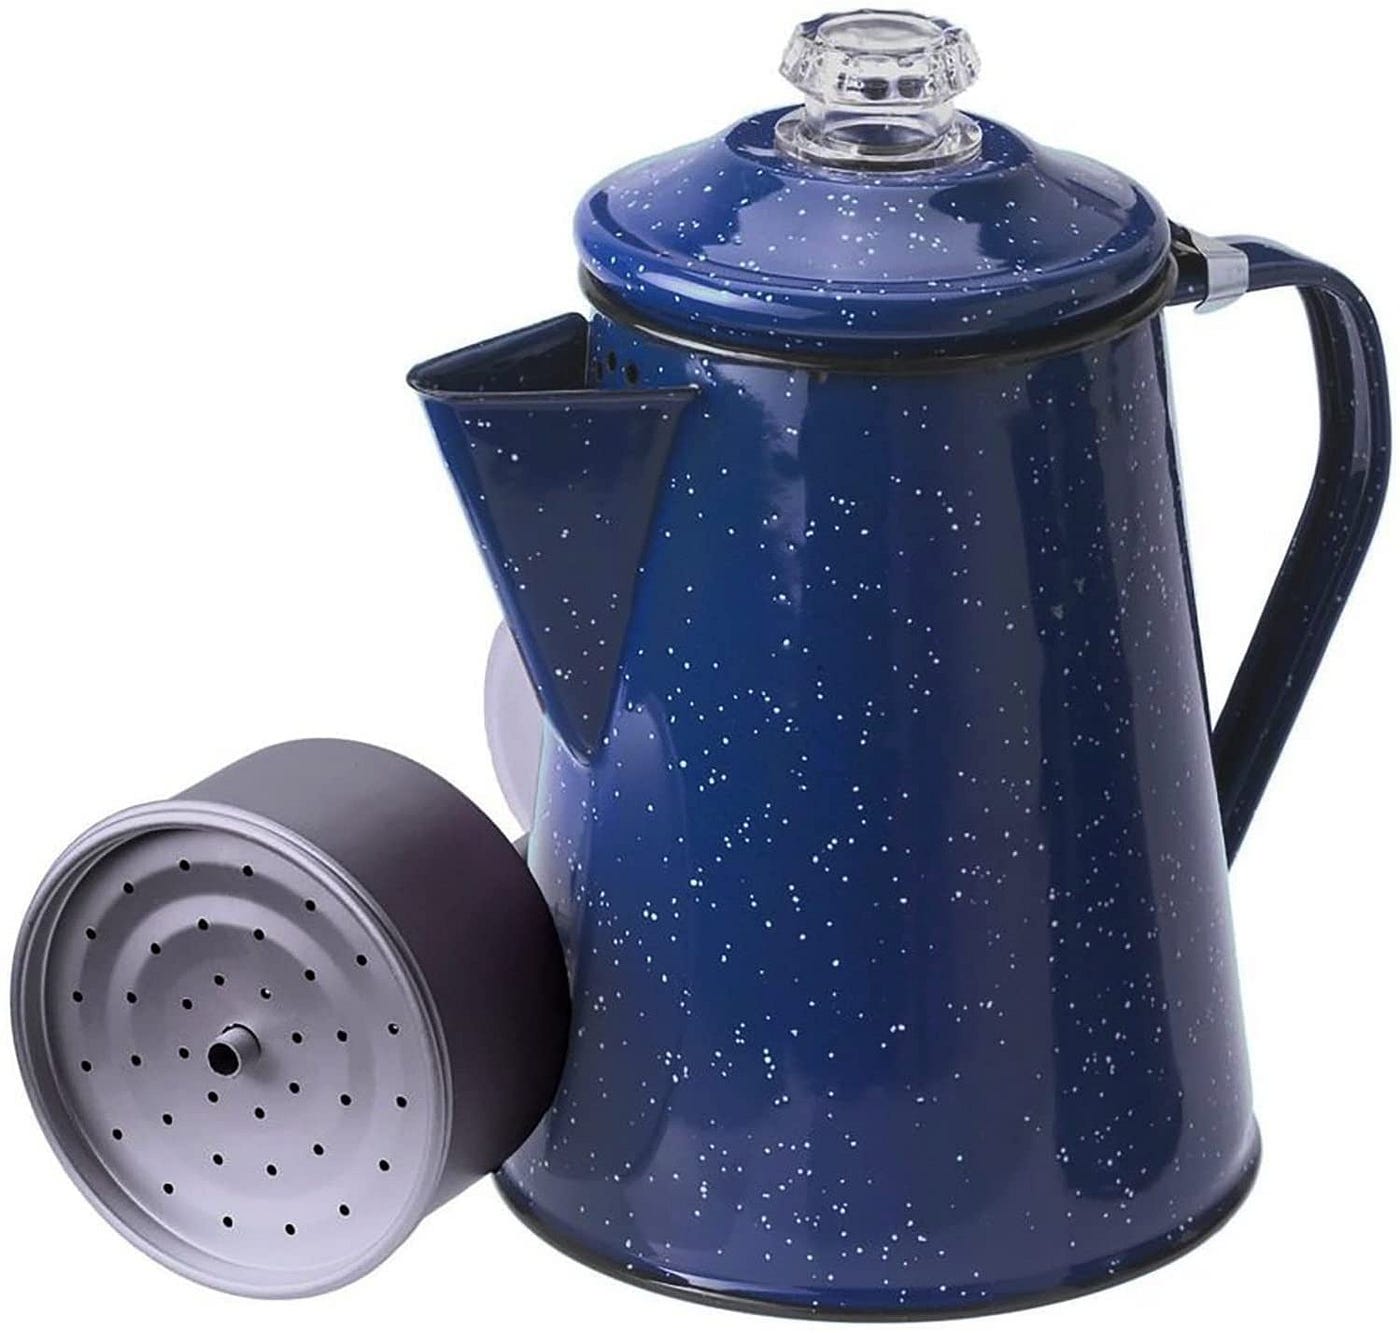
What is a camping coffee percolator and how do you use it? A camping coffee percolator is a stovetop pot that brews coffee by repeatedly cycling boiling water through coffee grounds. This guide provides camping coffee percolator instructions and a percolator coffee camping guide so you can make great campfire coffee.

Image Source: miro.medium.com
Choosing Your Camping Coffee Percolator
Before diving into brewing, let’s look at choosing the right camping coffee percolator. There are several factors to consider:
Materials
- Stainless Steel: Durable, rust-resistant, and easy to clean. This is a popular choice for campfire coffee percolator setups.
- Aluminum: Lightweight and heats up quickly. However, some people are concerned about potential aluminum leaching into the coffee.
- Enamelware: Offers a classic look and is fairly durable, but the enamel can chip.
Size
Consider how many people you’ll be brewing coffee for. Percolators typically come in sizes ranging from 4-cup to 12-cup.
| Size (Cups) | Ideal For |
|---|---|
| 4-6 | Solo camper or couple |
| 8-12 | Small group or family |
Features
- See-Through Knob: Allows you to monitor the brewing process and see the color of the coffee.
- Wide Base: Provides stability on a camping percolator stove or campfire.
- Comfortable Handle: Makes pouring easier and safer, especially when hot.
Gathering Your Supplies
Before you start brewing, make sure you have everything you need:
- Camping Coffee Percolator: Choose the right size and material for your needs.
- Coffee: Coarsely ground coffee is best coffee for camping percolator.
- Water: Fresh, clean water.
- Heat Source: A camping percolator stove, campfire, or portable burner.
- Measuring Spoon or Scoop: For measuring the coffee grounds.
- Mug: To enjoy your freshly brewed coffee.
- Towel or Pot Holder: To handle the hot percolator.
- Grinder (Optional): For grinding your beans fresh on site.
Step-by-Step Percolator Coffee Camping Guide
Here’s a detailed percolator coffee camping guide to brewing delicious coffee using a camping percolator:
Step 1: Add Water to the Percolator
Fill the percolator pot with water to the desired level. There are usually markings inside the pot to indicate the water level for different numbers of cups.
Step 2: Assemble the Percolator Parts
- Place the coffee basket (also known as the grounds container) inside the percolator. Ensure the stem is properly aligned. Fathoming camping percolator parts and function is crucial for optimal brewing. The stem is a hollow tube that connects the pot’s bottom to the grounds basket, allowing water to cycle up through the coffee grounds.
- Make sure the spreader (a perforated disc) is in place above the coffee basket. This helps to distribute the hot water evenly over the grounds.
Step 3: Add Coffee Grounds
Add coarsely ground coffee to the basket. A general rule of thumb is to use 1-2 tablespoons of coffee per cup of water, but adjust to your preference. Best coffee for camping percolator is a matter of taste, but a medium to dark roast often works well.
| Coffee Strength | Coffee to Water Ratio |
|---|---|
| Mild | 1 tablespoon per cup |
| Medium | 1.5 tablespoons per cup |
| Strong | 2 tablespoons per cup |
Step 4: Secure the Lid
Place the lid on the percolator and make sure it’s securely fastened.
Step 5: Heat the Percolator
Place the percolator on your heat source – a camping percolator stove or campfire. If using a campfire, be sure to use a grill or grate to keep the percolator stable and away from direct flames.
Step 6: Monitor the Brewing Process
Wait for the water to heat up and begin to percolate. You’ll hear a gurgling sound and see the coffee bubbling up through the clear knob on the lid (if your percolator has one). This is where camping percolator brewing tips become important.
Step 7: Adjust the Heat
Once the coffee starts percolating, reduce the heat to a low simmer. Percolating too vigorously can result in bitter coffee. A gentle simmer is key.
Step 8: Brew for the Right Amount of Time
Brewing time can vary depending on the size of the percolator and your desired strength. A general guideline is to brew for 6-10 minutes. Longer brewing times can lead to over-extraction and bitterness.
Step 9: Remove from Heat and Let Settle
Once the coffee is brewed to your liking, remove the percolator from the heat. Let it sit for a minute or two to allow the grounds to settle to the bottom. This will help prevent sediment from ending up in your cup.
Step 10: Serve and Enjoy
Carefully pour the coffee into your mug and enjoy! Add sugar, milk, or creamer to taste.
Campfire Coffee Percolator Method Considerations
Brewing coffee over a campfire requires a bit more attention and care:
- Stable Base: Ensure your percolator has a stable base or use a tripod to prevent tipping.
- Indirect Heat: Avoid placing the percolator directly in the flames. Use a grill or rocks to create a buffer.
- Monitor Closely: Keep a close eye on the brewing process, as the heat from a campfire can be unpredictable.
- Heat Protection: Use heat-resistant gloves or a pot holder to handle the hot percolator.
Percolator Coffee Camping Recipe Variations
While the basic method remains the same, you can experiment with different ingredients to create unique percolator coffee camping recipe variations:
- Cowboy Coffee: Add a pinch of salt to the grounds before brewing. This helps to reduce bitterness.
- Mocha Coffee: Add chocolate powder to the grounds for a rich, chocolatey flavor.
- Spiced Coffee: Add spices like cinnamon, nutmeg, or cardamom to the grounds for a warm, aromatic brew.
- Vanilla Coffee: Add a splash of vanilla extract to the brewed coffee for a sweet, comforting flavor.
Cleaning Camping Percolator
Proper cleaning camping percolator is essential to maintain its performance and prevent the buildup of residue.
Immediate Cleaning
- After each use, allow the percolator to cool completely.
- Remove the coffee grounds basket and discard the spent grounds.
- Rinse all parts of the percolator with hot, soapy water.
- Use a non-abrasive sponge or cloth to scrub away any coffee stains or residue.
- Rinse thoroughly with clean water.
Deep Cleaning
- Periodically, perform a deep cleaning to remove stubborn stains and mineral buildup.
- Fill the percolator with a mixture of equal parts water and white vinegar.
- Bring the mixture to a boil and let it simmer for 15-20 minutes.
- Allow the mixture to cool, then scrub away any remaining residue.
- Rinse thoroughly with clean water.
- For stubborn stains, make a paste of baking soda and water and scrub gently.
Drying and Storage
- Dry all parts of the percolator thoroughly before storing.
- Store the percolator in a dry place to prevent rust or corrosion.
Percolator Coffee Camping Troubleshooting
Even with careful preparation, you may encounter some issues while brewing coffee with a camping percolator. Here are some percolator coffee camping troubleshooting tips:
| Problem | Possible Cause(s) | Solution(s) |
|---|---|---|
| Weak Coffee | Not enough coffee grounds; Coarse grind | Use more coffee grounds; Use a finer grind |
| Bitter Coffee | Over-extraction; Too much heat; Fine grind | Reduce brewing time; Lower the heat; Use a coarser grind |
| Coffee Grounds in Coffee | Grounds bypassing the basket; Damaged basket | Ensure the basket is properly seated; Check the basket for holes or damage and replace if necessary |
| Slow Percolation | Clogged stem; Mineral buildup | Clean the stem with a pipe cleaner or small brush; Descale the percolator with vinegar and water |
| No Percolation | Not enough water; Heat source not hot enough | Add more water; Ensure the heat source is adequate |
| Leaking Percolator | Worn or damaged gasket; Improper assembly | Inspect and replace the gasket if necessary; Ensure all parts are properly assembled |
Frequently Asked Questions (FAQ)
Can I use pre-ground coffee in a camping percolator?
Yes, you can use pre-ground coffee, but coarsely ground coffee is generally best coffee for camping percolator because it prevents the grounds from passing through the filter and into your coffee.
How do I prevent my percolator coffee from tasting bitter?
Avoid over-extraction by reducing the brewing time and lowering the heat. Also, make sure you are using coarsely ground coffee.
What is the ideal water-to-coffee ratio for a camping percolator?
A good starting point is 1-2 tablespoons of coffee per cup of water, but you can adjust this to your personal preference.
How long should I brew coffee in a camping percolator?
Brew for 6-10 minutes, adjusting based on your desired strength and taste.
How do I clean a camping percolator after use?
Rinse all parts with hot, soapy water and a non-abrasive sponge. For stubborn stains, use a mixture of vinegar and water or a baking soda paste. Make sure you know all the camping coffee percolator instructions and you’ll be fine!
Can I use a camping percolator on an open campfire?
Yes, but be sure to use a grill or grate to keep the percolator stable and away from direct flames. Monitor the brewing process closely.
What if my coffee percolator isn’t percolating?
Make sure there is enough water in the pot and that the heat source is hot enough. Also, check for any clogs in the stem or basket.

Melody Smith is a passionate writer, outdoor enthusiast, and camping expert based in the Seattle Metropolitan Area. With a deep love for nature and adventure, she shares her personal experiences, tips, and insights on MyCampingPro.com. A seasoned camper and traveler, Melody combines her creative background in design and writing with her love for the great outdoors, offering practical advice and inspiring stories to help others make the most of their outdoor experiences. When she’s not exploring the wilderness, you can find her painting, collecting vintage treasures, or diving into a good book.
